This article was last updated on April 16, 2022
Canada: ![]() Oye! Times readers Get FREE $30 to spend on Amazon, Walmart…
Oye! Times readers Get FREE $30 to spend on Amazon, Walmart…
USA: ![]() Oye! Times readers Get FREE $30 to spend on Amazon, Walmart…
Oye! Times readers Get FREE $30 to spend on Amazon, Walmart…
By this point, you probably feel like you’ve seen every possible option of plait, braid, twist, and knot that exists. Well, we’ve got just the thing for your hair ennui: new braids! But these aren’t just any old plaits. We knew we would have to come up with some pretty spectacular criss-crossed coiffs in order to catch your seasoned eye, so we went to the major leagues for this one.
Here, Isabel Guillen, one of the master weavers from the Braid Bar at the John Barrett Salon, will show you how to craft two seriously amazing, unexpected woven ‘dos. Check the step-by-step guides, then start flexing those fingertips — you’re going to need them nice and limber before you try and tackle these twisted tresses.

The Beach Braid
This sexy, textured take on the classic waterfall braid has tousled appeal, without looking too messy or unkempt.

Start with wavy hair. Take a dab of styling balm and emulsify it in your hands, then run it over your hair to tame flyaways and give your locks that second-day look. Starting on the left side of your head, divide hair into three sections, and begin a French braid.
After you’ve created that first full cross-over, grab a section of hair right next to the braid and incorporate it into the plait, from the top. After you braid this piece in, leave behind the last section, so it’s no longer a part of the braid. Replace that strand with the piece of hair that is between your two remaining strands, adding it into the braid. Grab another adjacent section and weave it into the plait, continuing the pattern of adding in-between sections and leaving behind back pieces. This is what creates the waterfall effect.

Continue braiding in this pattern all the way around the top of the head, pulling the hair tighter on the left side as you go. This will help direct the braid up and around your head, rather than just going straight down.

When you reach your temple on the opposite side of your head, stop pulling in extra strands and just continue braiding downward with the hair you still have in your hands.

Finish the braid, then secure with a clear elastic. Grab a small piece of hair from the end and wrap it tightly around the elastic to conceal it. Once you’ve wrapped all the way around, take the loose end and tuck it into the braid to secure.

Take that front section from the right side of your head, then take the first two loose sections from your original waterfall braid and start a new braid, heading in the opposite direction from the first.

Use the same pattern you used for your first one, adding in strands in and leaving others behind.

Continue braiding the hair around the head in this pattern, making sure this second plait falls directly below your first one.

When you reach your ear, finish off the braid with your remaining hair, secure with an elastic, then wrap a loose piece of hair around it to hide.

This look gives you the best of both worlds: beachy waves…

… and a beautiful, cascading crown of braids. So gorgeous, and so low-maintenance once you’ve put it together. This look could easily last you two or three days — the mussed-up texture from sleeping on it and frolicking at the beach will only add to the sexiness.

The Faux-Braided Updo
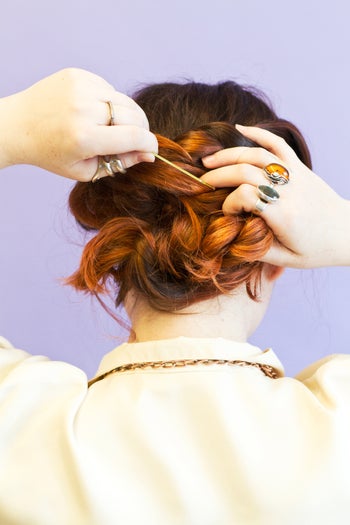
Looks like something only a master weaver could accomplish, right? Au contraire: These tricky tresses require exactly zero braiding know-how — that’s because this ‘do is made up entirely of twists!

Start with lightly textured, wavy hair. Guillen suggests softly running a few drops of Shu Uemura The Art of Hair Essence Absolue on dry hair to add shine. Grab the front section of hair on the right side of your head and divide it into two equal pieces.

Begin twisting the hair.

Add in the section of hair directly below those first two pieces, incorporating it into the twist.

Continue adding sections of hair as you go, twisting across the head until you get to the opposite side.

Once you’ve reached the back left side of the head, pin the twist in place with bobby pins, leaving the remaining hair in the twist loose.

Repeat this process on the opposite side.

Make sure your second twist goes directly above and across your first one.

Continue twisting the hair until you reach the nape of your neck on your right side.

Pin the twist at the nape of the neck to hold it in place. Grab a small piece of loose hair from the left side of your head and bring it over into the right twist, rolling it in. This is going to help you change the direction that your twist is going (from right to left). The piece should be diagonally parted, so that when you twist it in, your hair will begin to go in the opposite direction. The goal is to create an S-shape with your hair.

Once this twist has made its way back over to the left side of your head, grab all the remaining hair in your other hand.

Roll those pieces over each other to create one giant twist.

Take your finger and hook it in the middle of the twist.

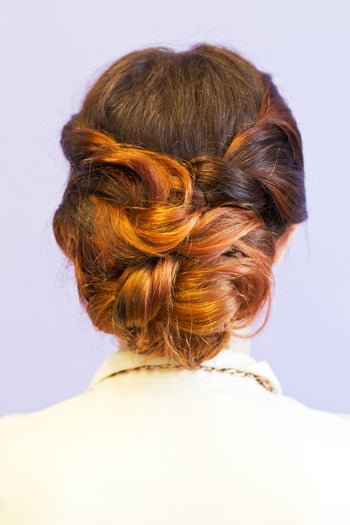
Twist the hair around the finger to create a big figure eight at the back of the head, then pin it in place. If any pieces fall out, just tuck them up and under the hair, then pin them to secure.

Since the majority of the hair handiwork is at the back of your head, from the front, your style looks very soft, romantic, and simple.

Once you turn around, that’s when the fun really starts. Thanks to all that twisting, layering, and direction-changing, your updo looks like it’s been braided by a pro. Only you’ll know the secret to your criss-cross coiff!
Photographed by:Guang Xu
Click HERE to read more from Refinery29.

Be the first to comment