This article was last updated on April 16, 2022
Canada: ![]() Oye! Times readers Get FREE $30 to spend on Amazon, Walmart…
Oye! Times readers Get FREE $30 to spend on Amazon, Walmart…
USA: ![]() Oye! Times readers Get FREE $30 to spend on Amazon, Walmart…
Oye! Times readers Get FREE $30 to spend on Amazon, Walmart…
When the polar vortex was descending and the world as we knew it turned into the likes of theCanadian tundra, we New Yorkers felt our body temperatures drop faster than panties in an Usher music video. In this kind of unforgiving weather, retaining body heat may take priority, but style is a close second — we do work at Refinery29 after all.
So, for the days when topping off your look with winter headgear is nonnegotiable, we consulted Myrna Palacios, hairstylist at Rita Hazan Salon in NYC, for the six hairstyles that’ll make (bad) hat hair a thing of the past.
The secret? Make your hairstyle intentionally messy. We found new ways to tease your hairlike you’ve never teased before. Windchill’s got nothing on you now.

Knit Headband
For this look, second-day, third-day, heck even week-old hair would work. The grittier and straight-up dirtier the hair, the better. Why? Height and texture are the name of the game here. Let’s start climbing.
Etro Cardigan; Novis Button Down; Olysenboye Twist Turban Headwrap, $18, available at JCPenney.

First, flip your hair upside down and gather everything into a high ponytail.

Take a small section of hair and wrap it around the elastic, then pin the ends in the back of the pony.
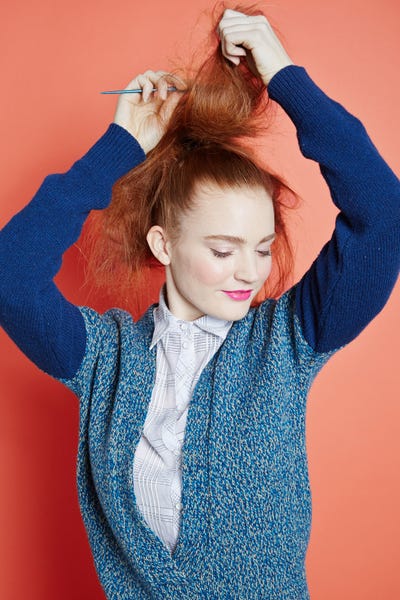
Tease the entire pony, in one-inch sections, with a small-bristle rattail comb. You want to go from tip to root, creating one gigantic knot of hair, says Palacios. Spritz the hair before and after teasing with Nexxus Comb Thru Touchable Hold Finishing Mist.
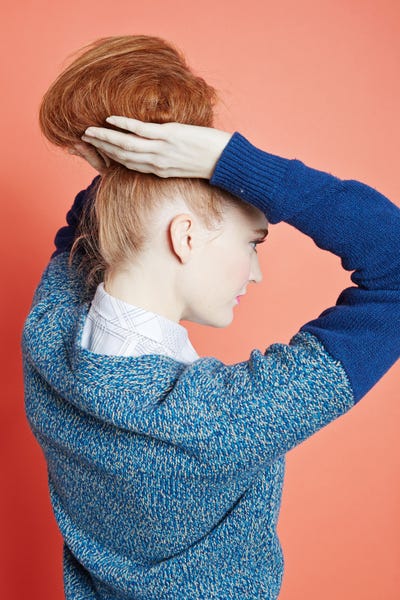
Take the massive knot of hair and shape it into the pouf you want. Tuck the ends of the hair under.

Then, using U-shaped pins, secure the updo all around your desired shape. Oh, and if you’re worried about undoing that pouf of hair, all you have to do is use a paddle brush with metal bristles to brush it out. Palacios just advises to start from the bottom up.
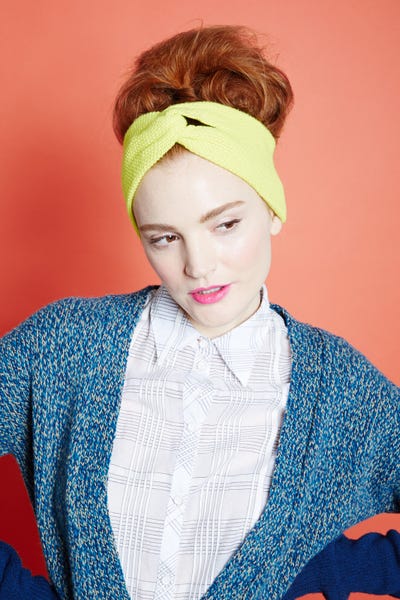
Who knew achieving so much volume could be so easy? If you don’t want to mess with your perfect pile of hair, you can have the headband around your neck before you begin teasing so that you can just pull it up without risk of messing up your mastertease. To complement that neon headband, we did a hot pink lip with Bite Beauty Cashmere Lip Cream in Moscato.

Embellished Beanie
Wearing every hipster’s hat of choice doesn’t mean you’re doomed to a bad hair day while shoving your hands in your pockets and kicking a can down the street. Instead, wear your favorite embellished beanie with these grown-up pigtail braids that are so wonderfully messy, they won’t remind you of schoolgirl pleated skirts or coquettish magazine spreads.
Etro Cardigan; Adeam Blouse; H&M Embellished Beanie.
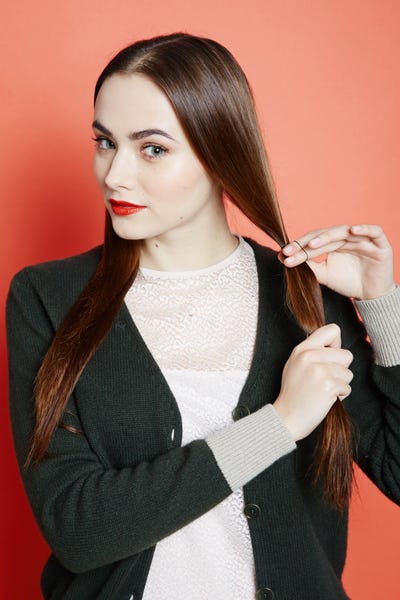
Split your hair into two loose pigtails, then tie each with an elastic. Wrap each with a small strand of hair, pinning it down in the back with a bobby pin.

Tease the hair, using a small-bristle teasing comb.
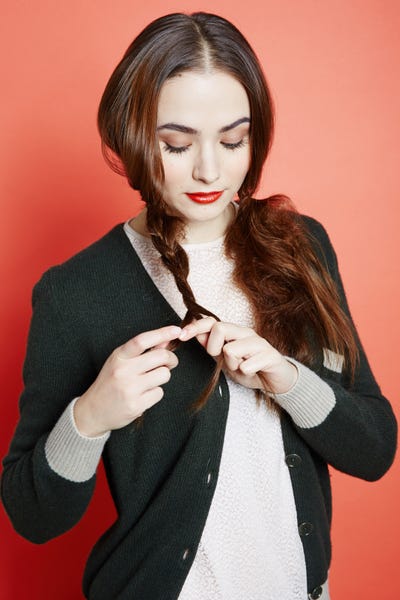
Begin braiding, making sure to keep it loose so that you maintain your texture. Secure with an elastic, and wrap it with a small section of hair.
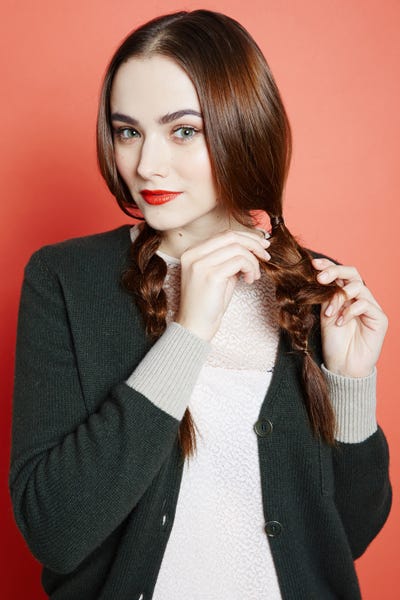
Using your fingers, pull the braid apart, then tease with your hands. The goal is to make it as messy as possible, for a less schoolgirl, more sophisticated finish.

Wrapping your hair around the elastics gives a more finished, pulled-together vibe for these braids.
Embellished Baseball Cap
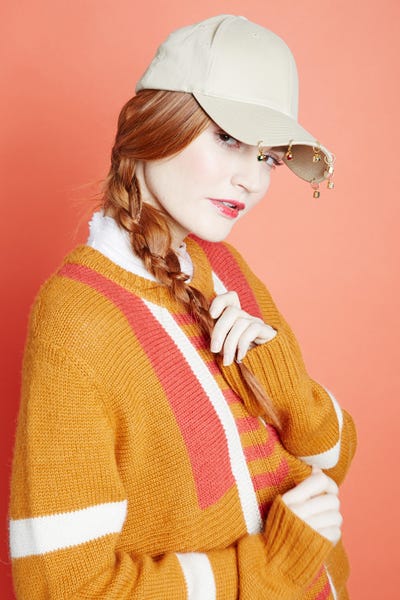
With baseball cap varieties becoming more and more of a style statement, finding a hairstyle to match the sports-fan staple is more imperative than ever. With that, let us introduce you to the four-strand braid. A simple twist on your regular plait that’s fitting for a cap with gold charms (!).
Orley Sweater; Marissa Webb Sasha Silk Wool Blouse, $285, available at Marissa Webb; Arielle de Pinto Crystal Cap, $95, available at Arielle de Pinto.
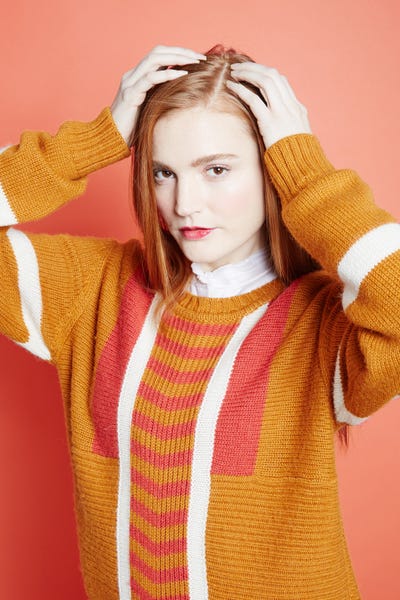
Do a natural part or a side part.

To add more texture, create a fishtail braid.
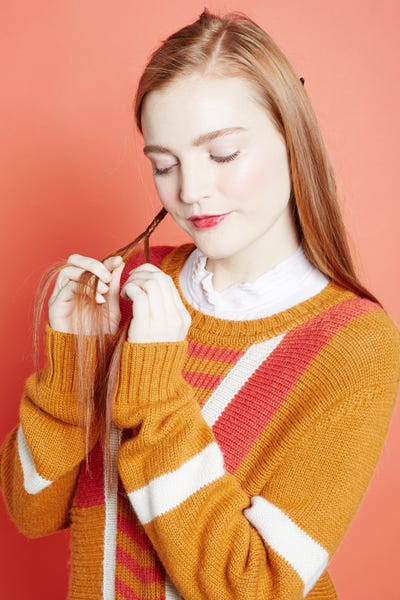
All you have to do is split your hair into two sections, then pull a tiny piece of hair from the back of one section and add it to the other.

Secure with an elastic. Still don’t get it? For a video tutorial, click here.

Create as many fishtail braids as you’d like. Here, we’re doing two. When you’re done with each, pull them apart with your fingers.

It’s time to put your hands to werk. Gather your hair into a side ponytail. Split your hair into four sections, keeping each separate with your fingers.

Imagine treating the inner two sections as the main braid, and the outer sections as the third part of the plait that rotates in. The far left goes over the second strand, and under the third; then the far right strand would go over the third strand, and under the second.
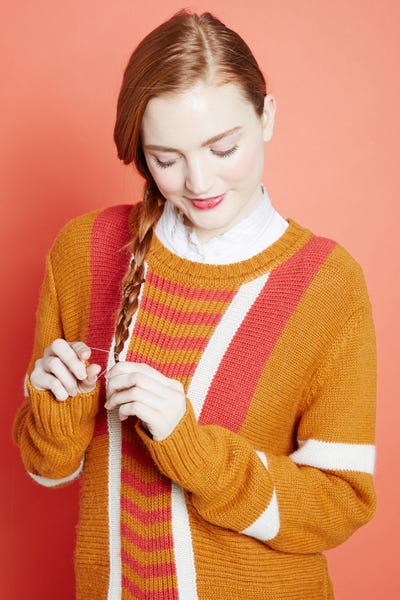
Continue until you reach the end and secure with an elastic. For your last step, “tease” your braid with your fingers, by lightly grabbing the end of your braid and sliding up the hair shaft. The key is to make it look intentionally messy.

Top off your woven braid with an embellished cap and you’re shake-shaking your way to a chic party or even a sports game.

Brimmed Hat
Oh, the hat that makes everyone think of J.Lo in her heyday. But, we’re teasing the curls to make them less Jenny from the block, and more naturally curly — as if you rolled out of bed lookin’ this good.
Design History Leopard Dress; H&M Wool Hat, $19.99, available at H&M.

Part your hair into three sections: left, right, center.

Beginning at the hairline, curl one-inch sections of hair. Wrap the hair flat on a one-inch barrel by clamping down at the root, then sliding and rolling the rest of the hair around the barrel. Once reaching the tip of the hair, roll it up to the root.
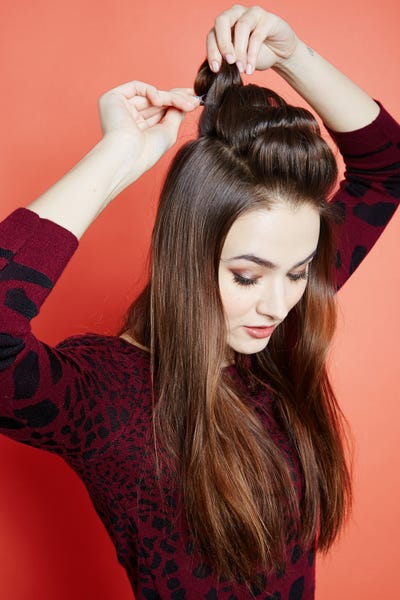
Release the curl and set with a duckbill clip, so that the curl cools down in its shape. “This will give you a fuller curl with extra bounce,” says Palacios.
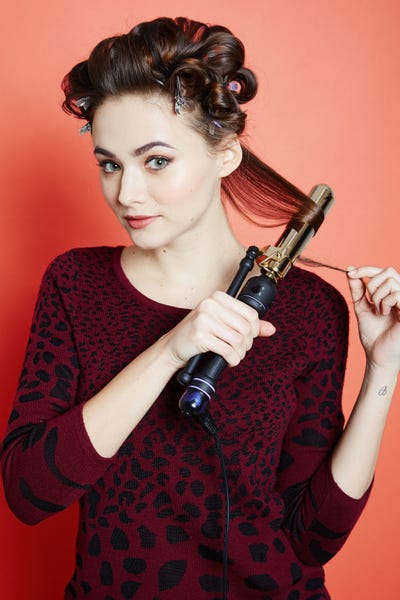
Continue curling all around your head. When you’re done, cover your pin curls in a cloud of hairspray.

Release the pins to let down your beautiful new curls.

For more volume, flip your hair upside down, shake, and spritz a generous dose of hairspray. Then, take your paddle brush (Palacios likes the Mason Pearson brush) to your curls, teasing upwards.

“Volume will keep the doctor away,” said no one but us. Just take our word for it.

Trapper Hat
Hair that bends instead of curves, a straightening iron that curls instead of straightens – this is the look that turns styling on its head (zing!) and into a beautiful haphazard look fitting for a big fluffy hat like the trapper. “It’s all in the twist of the wrist,” says Palacios. Ready to begin?
Design History Turtleneck; Carolina K Onesie; GlamourPuss Trapper Hat; Alibi Infinity Necklace, $60, available at Alibi.

First, section off the bottom layer of your hair; then clip the top part out of the way.

Holding your flat iron vertically, clamp an inch section of hair in the iron and slide it down while twisting your wrist. This will put a bend into the hair. Depending on the length of your hair, you’ll want to do two to three twists. Make sure to leave the ends of your hair straight for a piece-y, rock ‘n’ roll finish with the volume iconcentrated in the middle of the hair shaft.
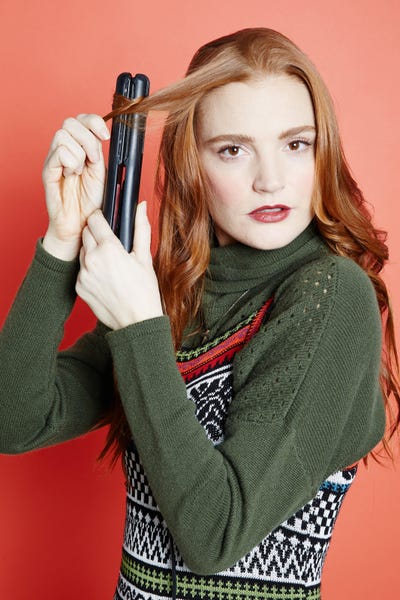
Continue working, section by section. Palacios says to twist your wrist in a different direction for every other section of hair, so that the waves aren’t all facing in one direction.

Finish with a spritz of hairspray, tousle, and you’re done! To go with the winter vibes, we went for a deep berry lip with MAC Lipstick in Viva Glam 3.
Beret
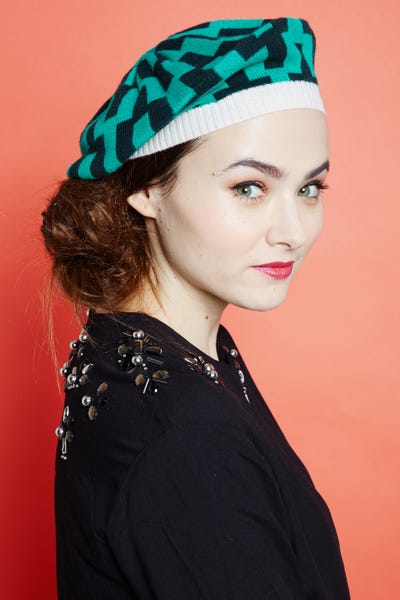
If you haven’t gathered already, teasing is a big deal here. Making your hairstyle intentionally “frizzy” is our way to mask any impending “hat hair.” For this patterned beret, we like the idea of having a highly-teased side bun for a look that’s très chic.
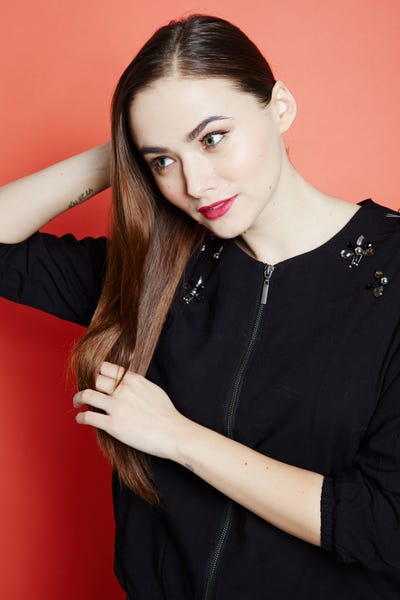
Begin by gathering your hair into a low side pony.
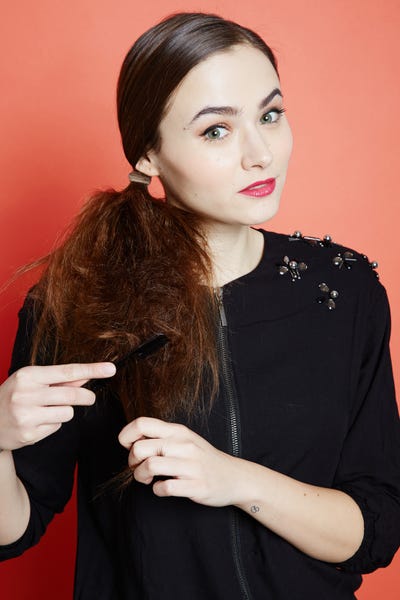
Then, tease it, making sure to concentrate your tease near the base of the pony for more volume, since that’s where you’re building the bun. Spray with hairspray.

Place four U-shaped pins around the base of the pony to use as anchors. You’ll see what we mean. Roll all your hair around your finger, into a loose chignon. Using four more U-shaped pins, secure the bun, pinning into anchor pins (already in place) to really lock it in.
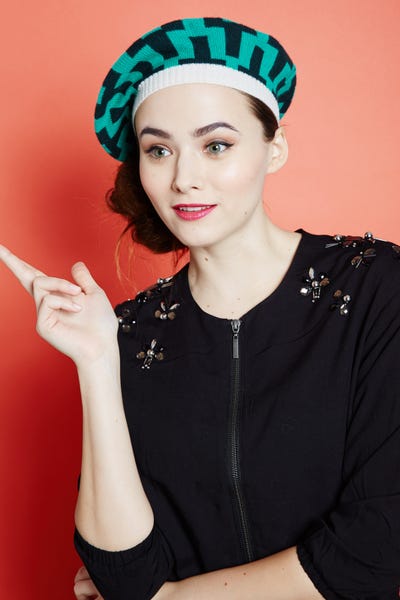
Finish with a spritz of hairspray for good measure and you’ve got a soft, messy bun. Top off the look with a pop of pink, like NARS Satin Lip Pencil in Jardin de Plantes.
Makeup by Ashleigh Ciucci;
Modeled byKristina W/Fenton Moon;
Modeled byDavis/Red Models;
Styled by Courtney Ann;
Photographed by Lauren Perlstein
Click HERE to read more from Refinery29.

Be the first to comment